What is a Chat Funnel?
Chat Funnels transforms the way you build chatbots in WordPress. As a powerful conversational marketing tool, it provides you with a way to guide your website visitors through a fully automated and personalized sales and support process. Your goal is to optimize the conversion of leads into satisfied and engaged customers.
Chat Funnels conversations are not generic; they are designed to be fully customizable depending on the context, whether it is a specific page, a product or a category.
Use Chat Funnels and discover how an effective interaction can change the dynamics of your online business, providing a richer and more individualized experience for each visitor.
Video Presentation
Chat Funnels Activation
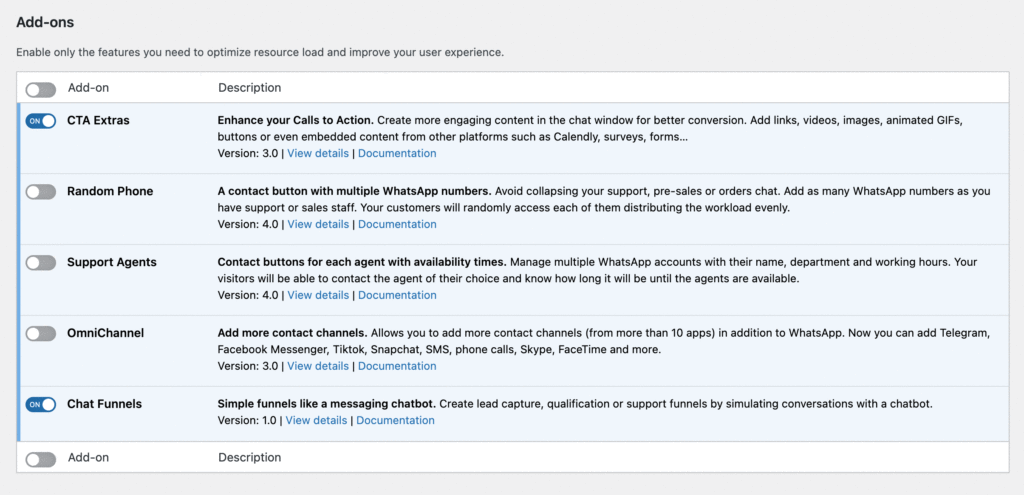
To add and configure new channels, go to the WordPress dashboard in the Joinchat > Settings > Premium menu and enable (ON) the Chat Funnels add-on.
Chatbots Templates
In the WordPress dashboard, go to the left side menu, Joinchat > Chat Funnels.
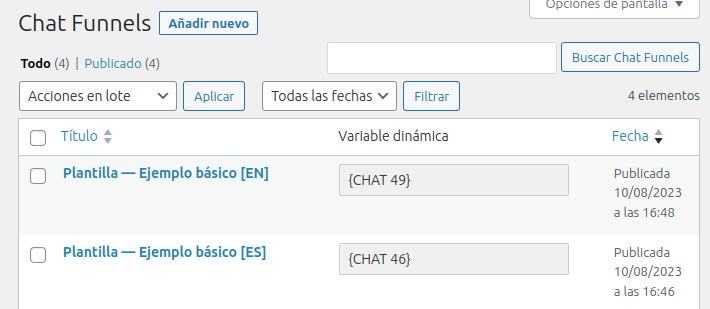
By default we have created three example templates that we recommend you review and use as a basis for new Chatbots.
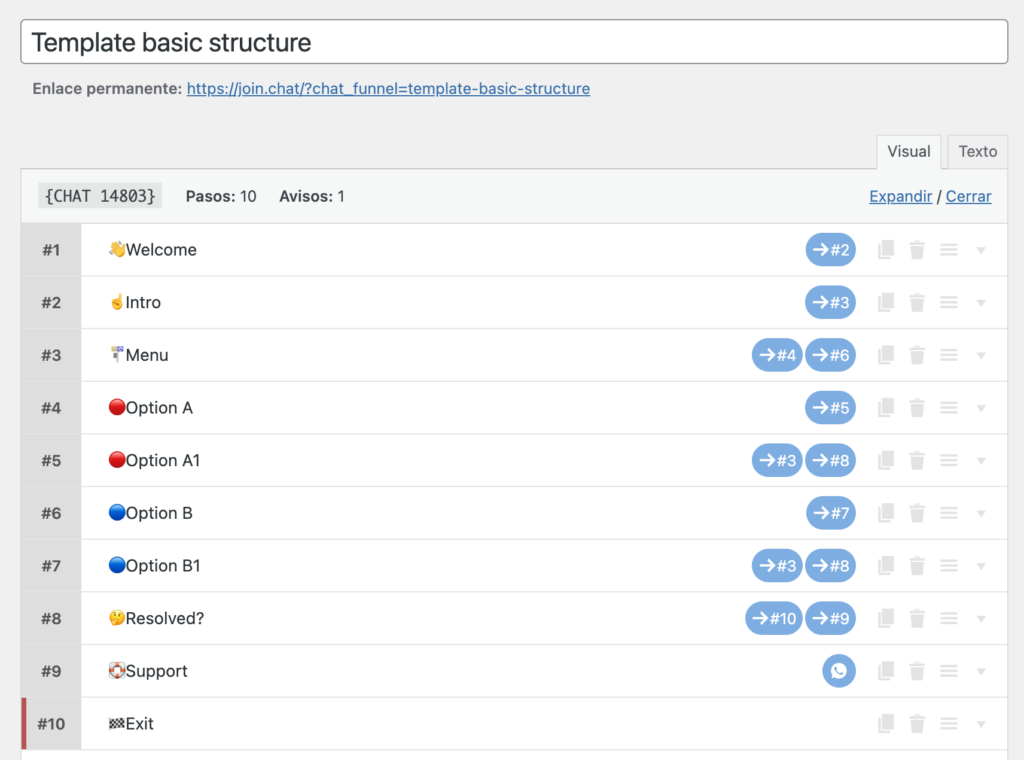
The “Basic Structure” template gives you an overview of the steps that your chatbot should contain, you will see that there are 10 in total and they are described and identified according to their functions. You can modify and add new steps from this initial template.
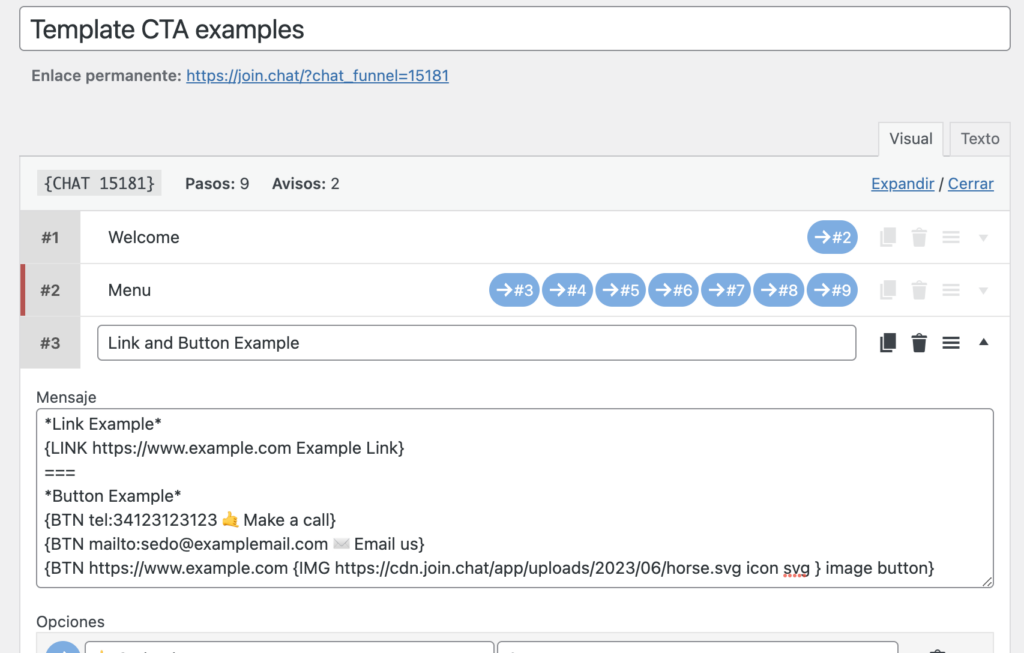
The “CTA Examples” template is a showcase of the different options you can use to compose your messages or integrate external tools. You can see in each step examples of use and features with examples of how to add Buttons, Links, images, videos or iframes, even random texts so that your chatbot doesn’t sound repetitive.
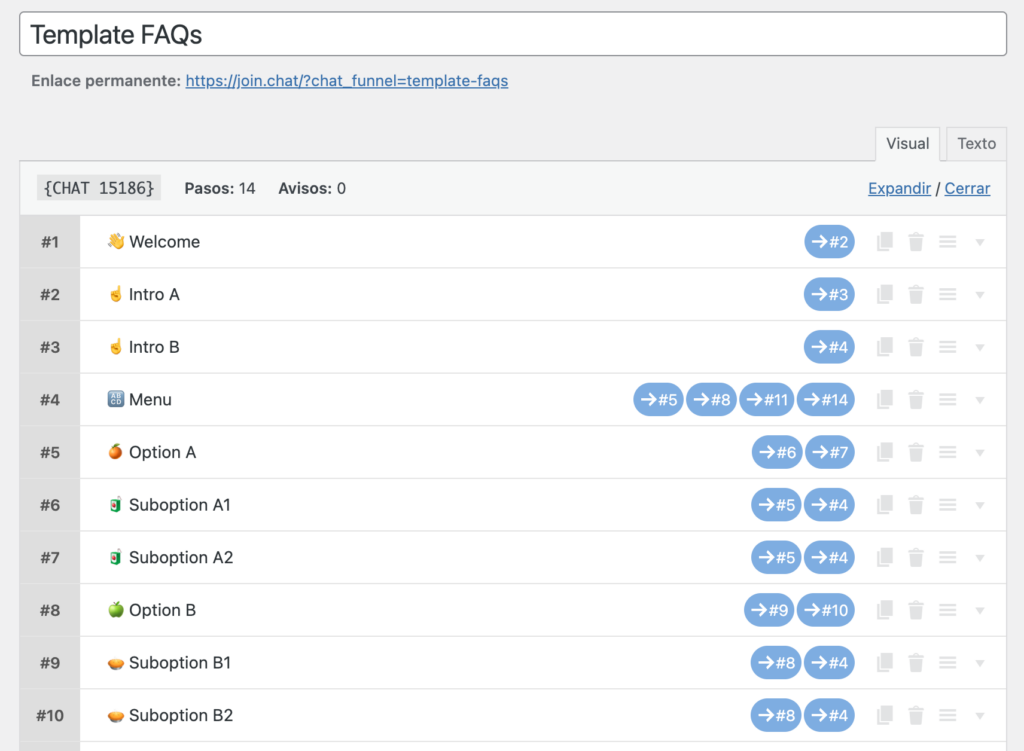
In the “FAQs” template you will find the basis already created for a chatbot that answers frequently asked questions, with two levels of depth. You can simplify or expand this template to your liking and depending on the number of categories and questions you need.
Workspace
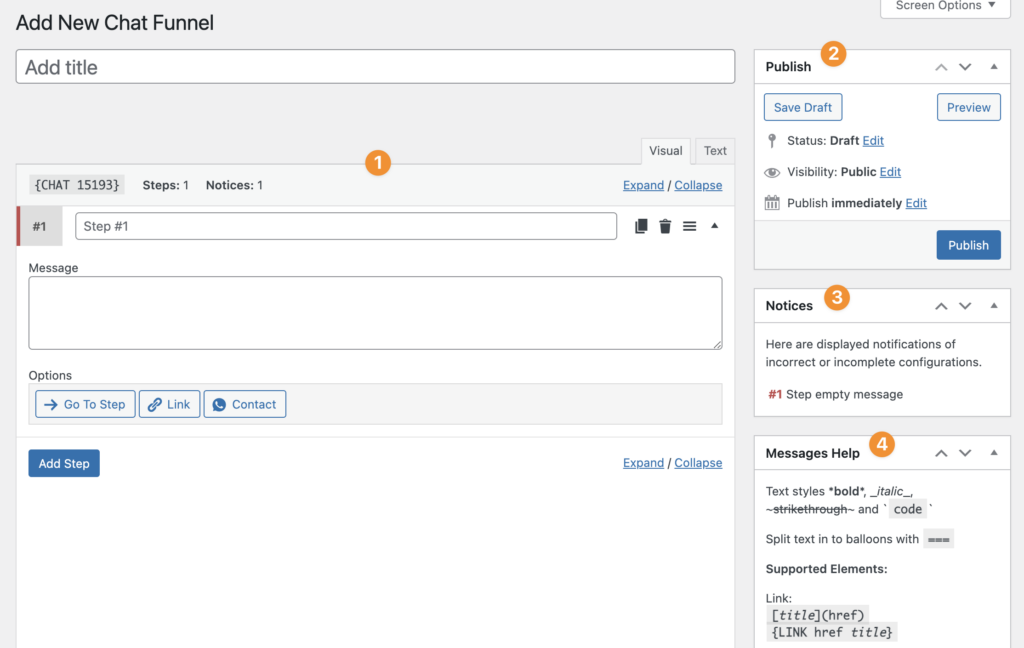
The first thing to do is to create a new Chat Funnel from the Joinchat menu in WordPress, to do this click on “Add Chat Funnel“. Then put a title and publish your chat funnel.
- The main area is the editor where you can add steps and define their functions and features, as well as copy the shortcode of your chatbot in order to publish it in the Joinchat chat window. By default it starts with a first step already created.
- On the right the Publish block, is the WordPress standard and allows you to see a preview of your Chatbot.
- The Notices block, where you will be alerted of possible errors in your chat funnel, note that they don’t always have to be, but it will help you to check your chatbot.
- Messages Help, is a block where you can see the styles and elements supported by the message field that will have each step you define in your chat funnel. Basically they are the same as the ones you could use before in the CTA extras plugin.
Editing a Chat Funnel
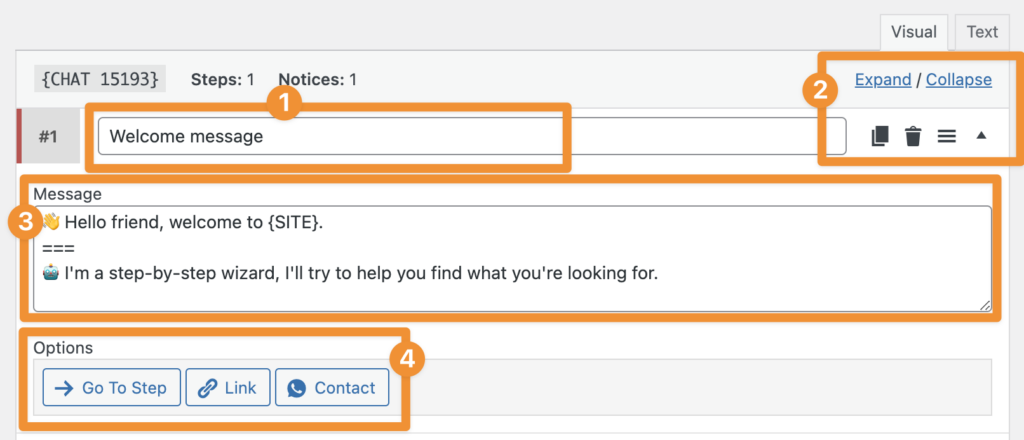
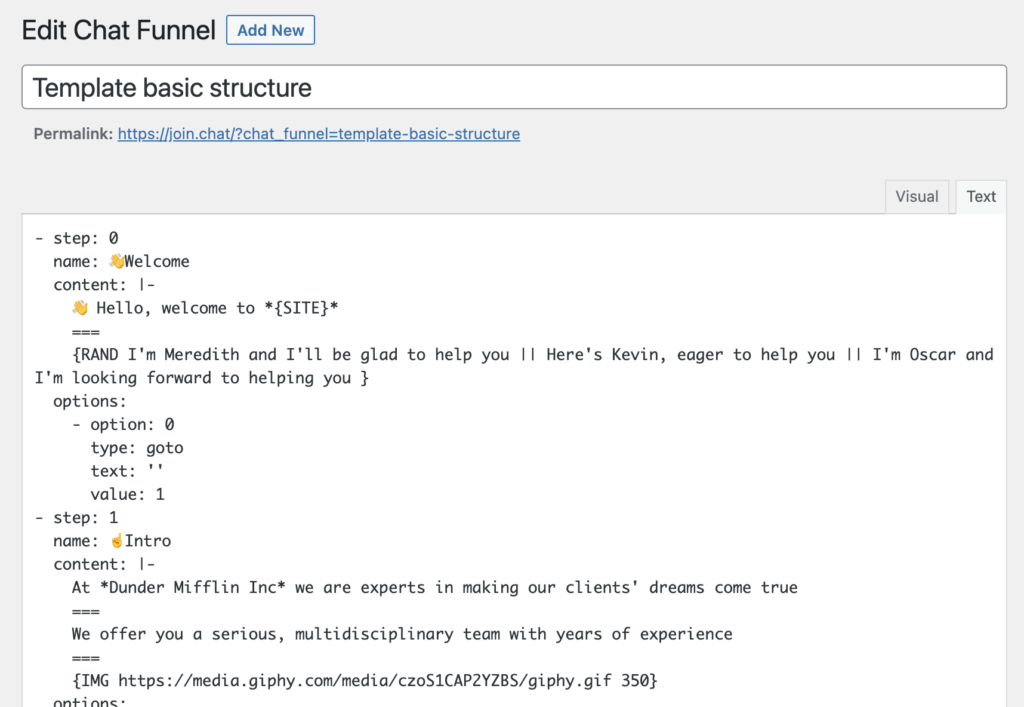
- Here you define the title of this step, try to be concise and descriptive, you can use emojis if you want to have a visual guide of the steps.
- Here you can collapse or expand all the steps to make it easier to see them or move steps by dragging. There is also a row with 4 buttons: The first icon to duplicate the step, another to delete it (for security, three clicks are required as this action cannot be undone) one more to move (Drag & Drop) the step to another position and finally to collapse this step only.
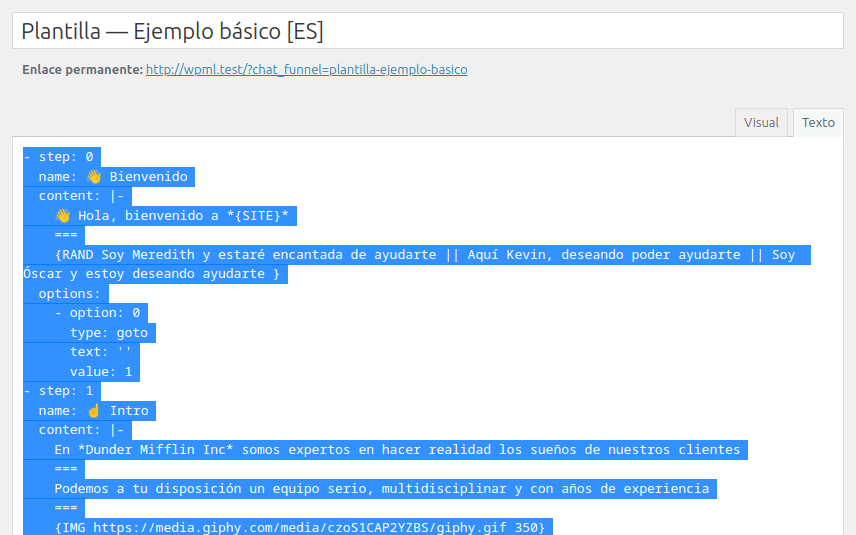
- From here the message of the current step is created, it can be a simple text, but remember that you can use multiple styles and elements, all available and explained in the block on the right that we saw earlier. In the following example we launch a first balloon with the welcome, using the variable
{SITE}, followed by a second balloon (separating the text using===). - The general options for the steps are three, go to another step, add a link to another page or URL and contact showing the channels configured in Joinchat.
You can add as many steps as necessary, combining the three options and messages as needed, depending on the type of flow you want to create.
Publishing your Chat Funnel
Once you’ve designed your Chat Funnel, it’s time to put it into action on your website.
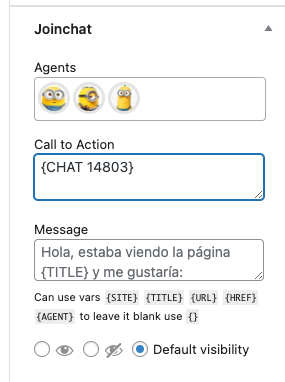
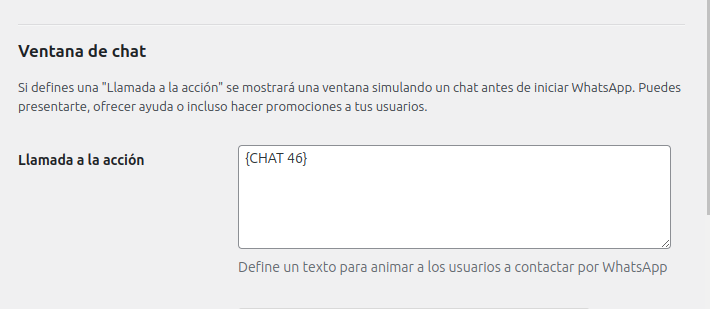
Each Funnel has a shortcode {CHAT 14803}, copy and paste it into the Joinchat’s call to action window, it can be in the general settings or on a specific page or product.
As you can see, there’s no need to write a single line of code, and you can create everything from a simple flow to a complex bot that answers frequently asked questions, all depending on your specific needs.
If you still feel like reviewing the code, just go to the Text tab and you can edit, copy, or paste the entire chatbot from there.
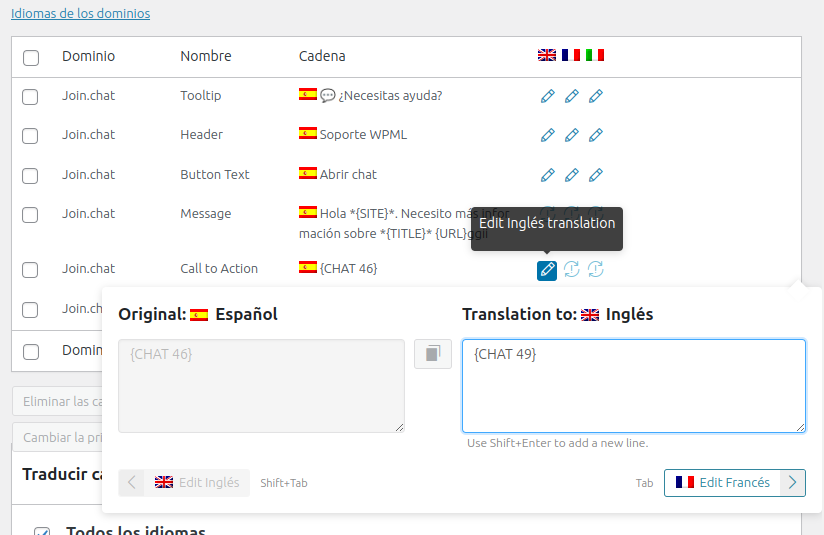
Translating your Chat Funnel
Creating translations of your Chat Funnel is very simple, the first thing to do is to create a Chat Funnel for each language.
Once you have created them, you must assign the Funnel of the main language of the site in the Joinchat settings (in our example, Spanish):
Finally, in the Joinchat translations in “Call to Action” we assign the Chat Funnel corresponding to each language:
☝️ Tip: To duplicate the Chat Funnel the easiest way is to edit the original, click on the text tab, select all, copy and paste in a new Chat Funnel. Then save and that’s it. Even to translate it can be more comfortable in the text format, but be careful not to break the format.