Onboarding
Through the wizard you can perform the first basic configuration. Thanks to the step-by-step guide, in just a few seconds you will have Joinchat ready to start working. Remember, you can exit the process at any time and go directly to the settings.
Components
To help you understand how Joinchat works, we want to show you an outline of all the elements that make up our plugin, so you’ll know what we mean at all times.
- Button
- Notification Balloon
- Tooltip
- Chat Window
- Call to action (CTA)
- Start WhatsApp button
- Header
General tab

In the WordPress side menu, go to Joinchat> Settings. In the General tab you can set the basic values for the plugin:
Button
Set the contact number and where and how you want the WhatsApp button to be displayed.
- Telephone. This is the WhatsApp contact number. Define the prefix using the international flags of the countries. Test number. Click this button and check that everything works correctly. The button will not be displayed if this field is empty
- Message. Predefined text for the first message the user will send you. Write the text that will attract and impact your visitors and users in general. You can use dynamic variables
{SITE}{TITLE}{URL}{HREF}. It has a predefined default text that you can modify by editing or double clicking on the text box. For example: Hello{SITE}. I need more information about{TITLE}{URL} - Image.Image that replaces the default icon. The image will alternate with the button icon. The new image will alternate with the Joinchat logo. Supports files, JPG, PNG, GIF (including animated). Click the Select image button and choose a button image from your media library
- Información emergente. Pop-up information. Short text displayed next to the button. That tooltip can be edited by typing something else or also modified by double clicking on the text box. For example:
💬¿Need help? - Position on screen. Choose between right or left the location of the floating button.
- Button delay. Time from opening the page until the WhatsApp button is displayed. Set (-1) to display directly without animation. Value set in seconds
- Mobile only. Check the box to only show the button on mobile. By default it is shown at the same time for both desktop and mobile versions
- WhatsApp Web. Check the box to open WhatsApp Web directly on the desktop. By default it opens the WhatsApp application
- Código QR. Check the box to display a QR code in the desktop version that allows scanning with the phone. Provides users who are viewing the web page on desktop with an alternative QR code to the click, which can be scanned from the cell phone. This makes it easier for people who do not have certain applications installed on their desktop computers to launch them from their cell phone easily and instantly. To display the code, simply hover the mouse pointer over the button and wait a moment

Chat window
If you define a “Call to Action” a window simulating a chat will be displayed before WhatsApp is started. You can introduce yourself, offer help, or even advertise to your users.
- Call to action. In the chat window you can define a text (CTA) to encourage users to contact via WhatsApp. You can write text with formatting styles like in WhatsApp: _cursiva_ *negrita* ~tachado~. Even use emoji icons and ASCII code. You can use dynamic variables that will be replaced by the values of the page visited by the user:
{SITE}(Joinchat),{URL}(https://join.chat/example){TITLE}(Page title).
For example:Hola 👋 ¿En qué puedo ayudarte? - Button text. WhatsApp home button text in the chat window. For example:
Open Chat - Theme color. Choose the color of your choice from the color palette or type it in hexadecimal code. It will customize the color of the floating button and the chat window.
- Dark mode. (No / Yes / Auto) Displays the chat window with a range of dark colors. If set to automatic it detects the dark mode setting of the device.
- Header. You can choose between displaying It works thanks to Joinchat by Joinchat, WhatsApp or a custom text that you define.
- Opt-in text. This is the consent of users to receive messages from a company. You must include a text explaining how you will use the data you will collect, including a link to the Legal Notice, Data Protection or Terms of Use. For more information, please read the official WhatsApp guidelines carefully.
- Opt-in required. Check the box if user approval is required to enable the contact button. If you check this option the user will be forced to check an acceptance box, as the contact facility will not be enabled without this requirement and no user will be able to initiate the chat unless they have checked the Opt-in.
Click the Save Changes button to set the new values indicated.
Display automatically
If a “Call to Action” has been defined, the chat window can be displayed automatically to catch the user’s attention. Triggers are available on click, scroll or you can set a custom phone number and initial message.
- Chat Delay. The chat window is automatically displayed after the delay. Set the value in seconds. Set (0) if it is to disable.
- Visit. The chat window is automatically displayed based on the number of visits. It is set as an absolute value.
- Warning balloon. Check the box to display a red warning balloon with a notification instead of opening the chat window for a “less intrusive” mode.
Click on the Save changes button to set the new values indicated.
Visibility tab
The second tab is Visibility. Here you can configure on which pages the WhatsApp button will be visible. Click on the Restore default visibility link to return to the initial values.
Global. Visible (On) / Not Visible (Off)
- Front page. Options: Visible / Not visible / Inherit
- Blog page. Options: Visible / Not visible / Inherit
- 404 page. Options Visible / Not visible / Inherit
- Search Results. Options: Visible / Not visible / Inherit
- Archives. Options: Visible / Not visible / Inherit
- — Date Archives. Options: Visible / Not visible / Inherit
- — Author Archives. Options: Visible / Not visible / Inherit
- Singular. Options: Visible / Not visible / Inherit
- — Page. Options: Visible / Not visible / Inherit
- — Post. Options: Visible / Not visible / Inherit
- Custom Post Types. Options: Visible / Not visible / Inherit
- Reviews. Options: Visible / Not visible / Inherit
- Docs. Options: Visible / Not visible / Inherit
- Addons. Options: Visible / Not visible / Inherit
Custom content types
- Portfolio. Options: Visible / Not visible / Inherit
WooCommerce
- Tienda. Options: Visible / Not visible / Inherit
- — Product page. Options: Visible / Not visible / Inherit
- — Cart. Options: Visible / Not visible / Inherit
- — Checkout. Options: Visible / Not visible / Inherit
- — Thank you page. Options: Visible / Not visible / Inherit
- — My Account. Options: Visible / Not visible / Inherit
Click on the Save changes button to set the new values indicated.
Advanced tab
In the third tab of Advanced settings you have:
- Google Ads Conversion. Create your conversion in Google Ads and add the Conversion ID and Conversion Tag. Thereafter, Joinchat will send the conversion automatically when you start the chat.
- CSS personalizado. Add here your own CSS code to customize the look and feel of Joinchat You can find examples and more tricks here here.
- Delete on uninstall. Check the box and all Joinchat settings will be deleted.
Click on the Save changes button to set the new values indicated.
WooCommerce tab
If you have the WooCommerce plugin installed you can configure Joinchat in your shop as well.
👉 Go to the WooCommerce tab to set up the settings for Product Calls to Action and for Products on Sale, as well as for Product Messages. This will save you a lot of time and make you more productive by using variables (remember that you can define specific texts on each product page).

Product chat window. You can define different texts for the chat window on the product pages.
- Call to action for products. CTA window that defines text to encourage users to contact WhatsApp. You can write text with formatting styles as in WhatsApp: italic_ black ~blackened~. Even use emoji icons and ASCII code. You can use the dynamic variables that will be replaced by the values of the product page the user visits:
{PRODUCT}(Product name),{SKU}(ABC98798){PRICE}(Product price).
For example:¡This *{PRODUCT}* can be yours for only *{PRICE}*! - Call to action for products on sale. It is the same as the previous case, but it will only work for products on sale. You can use the dynamic variables that will be replaced by the values of the product page the user visits: {REGULAR} (Normal price), {PRICE} (Discounted price), {DISCOUNT} (Percentage discount).
For example:¡Save *{DISCOUNT}* on *{PRODUCT}*. It can be yours for just ~{REGULAR}~ *{PRICE}*. - Message for products. Predefined text of the first message sent by the user through WhatsApp. You can use the {SITE} {URL} {TITLE} variables. For example:
Hello {SITE}. I have a question about {PRODUCT} - {SKU}
Click the Save Changes button to set the new values indicated.
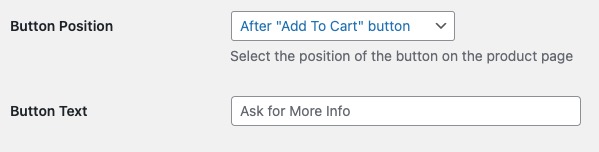
Product button. You can add a contact button on the product sheets of your store.
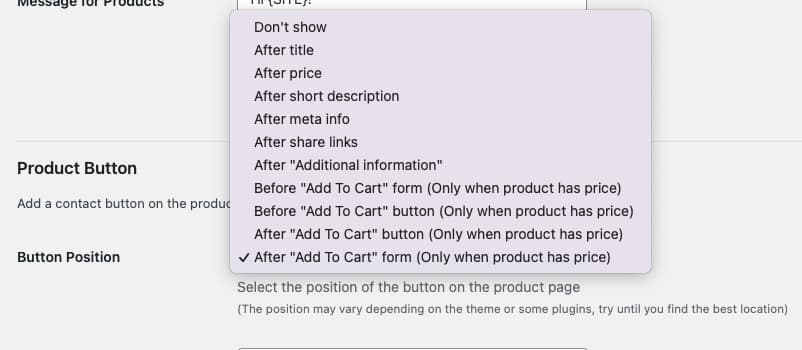
- Select the Button Position you prefer, “Don’t show” keeps the button disabled. Any of the other options will show a green WhatsApp button, the text of the button must be defined in the Button text field.
Catalog, cart and checkout pages. You can modify the Joinchat settings for these pages by editing the page in the Joinchat Metabox (as in the previous section “At a page level“).
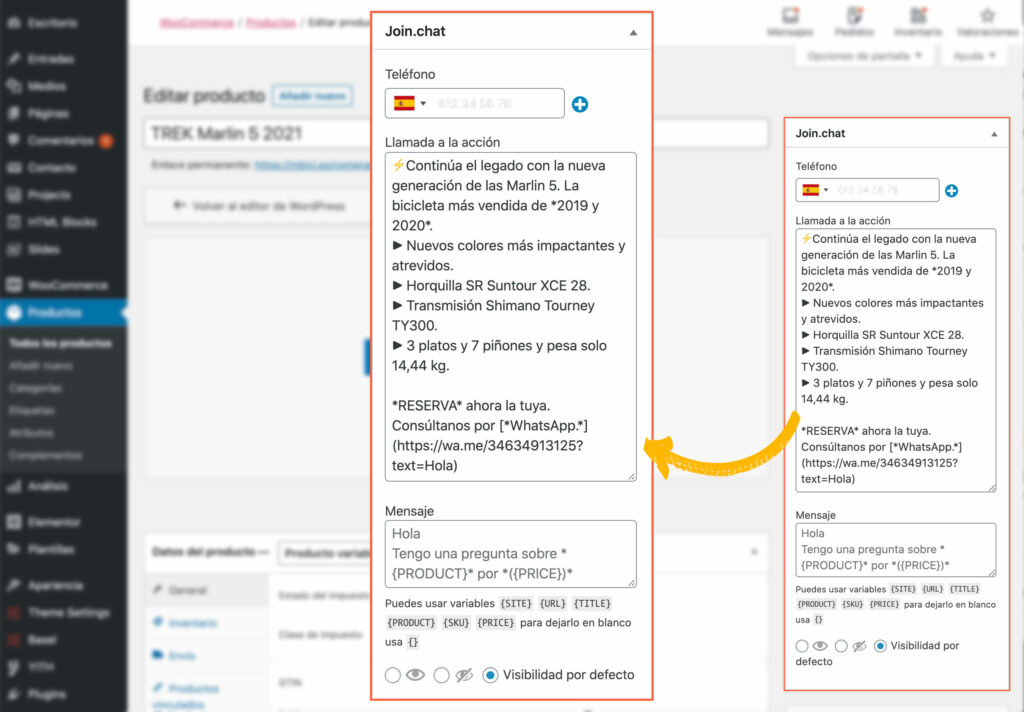
At a page level
- To change the general settings on a specific page or entry, go to that page and edit it.
- On the right side you will find the Joinchat Metabox where you can modify the Phone, as well as the Call to Action, Message and Joinchat display options for this particular publication.
- Finally click on Update.
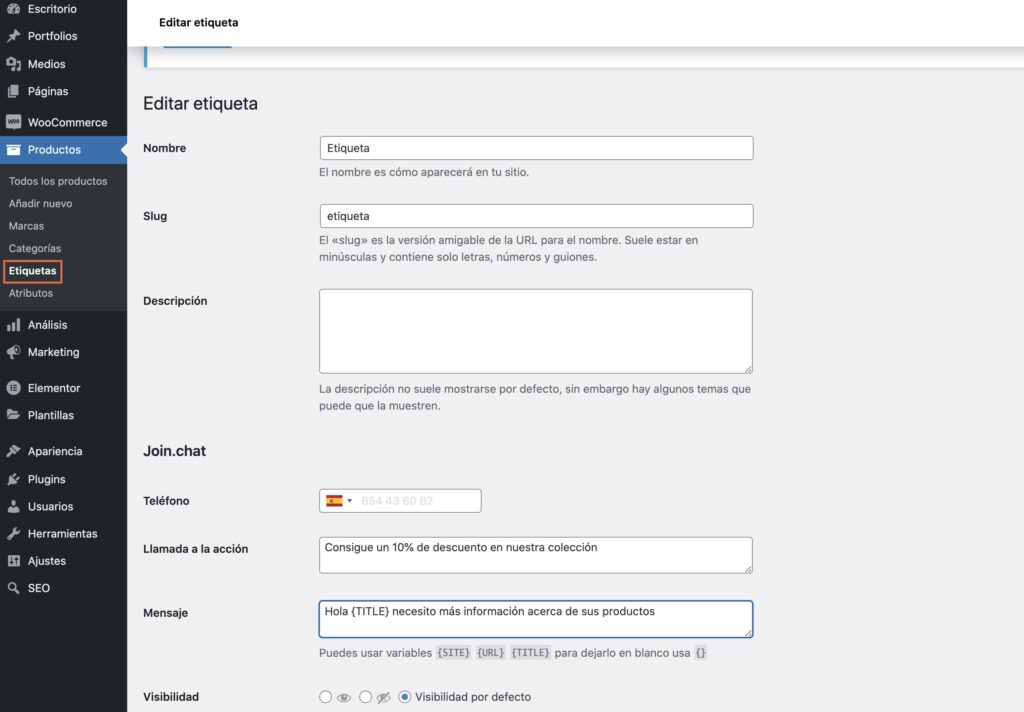
At category or tag page level
- To modify the general settings on the archive page of a category or tag, go to its listing and edit it.
- In the form you will find the Joinchat section where you can modify the Phone, as well as the Call to Action, the Message and the Joinchat Display Options for that particular category or tag.
- Finally click on Update.
By default, Joinchat can be customized in WooCommerce blog and product tag and category taxonomies. With the filter 'joinchat_taxonomies_meta_box' you can add other “Custom Taxonomies”.
Advanced

Under the Advanced tab you can configure some special features:
- Opt-in. This is the consent of users to receive messages from a company. You must include a text explaining how you will use the data you will collect, including a link to the Legal Notice or Use Policy. For more information, please read the official WhatsApp guidelines carefully. Opt-in Required. If you check this option the user will be obliged to check an acceptance box, since the possibility of contact will not be enabled without this requirement and no user will be able to start the chat unless they have checked the Opt-in.
- Conversions. From here you can add the Google ads conversion tag, so it will be sent automatically when you start the chat.