What is an AI Assistant?
Joinchat AI✨ is an advanced artificial intelligence service integrated with the popular WordPress plugin, Joinchat. It allows users to create a conversational assistant powered by AI that automatically learns from the information available on your website’s URLs, facilitating interaction with visitors through live chat and automating up to 80% of customer service queries.
Chatbot Customization

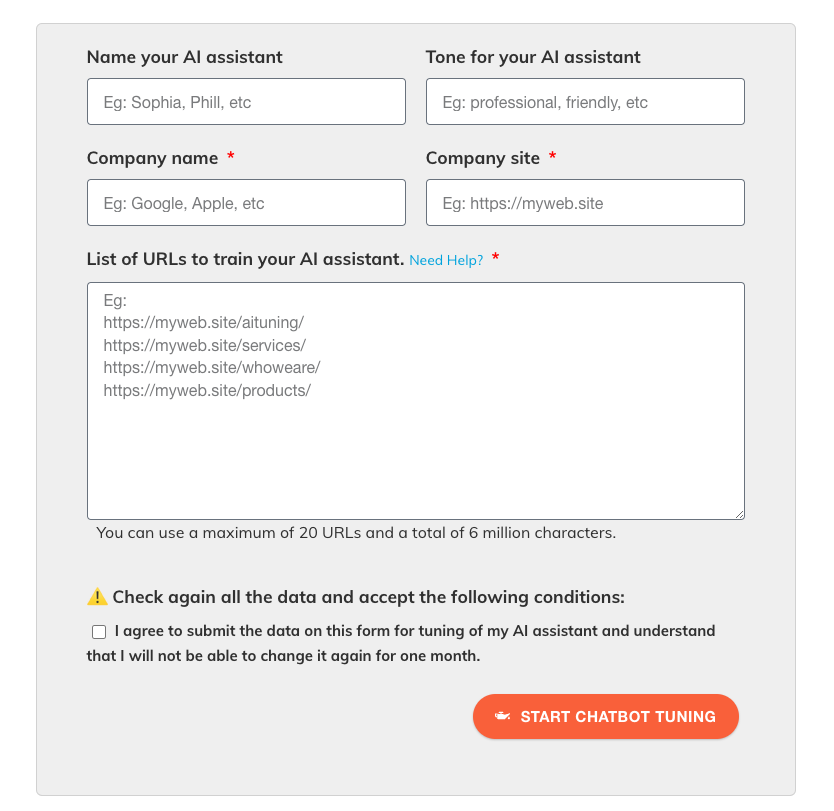
Once you have completed the service subscription, the system will direct you (you will also receive an email) to the assistant settings page. From here, you will need to fill out the following fields:
Name of your AI Assistant:
This is the name your chatbot will have. Choose a name that represents your AI assistant attractively for your users. For example, you could choose names like “Sophia”, “Phill”, or any other name you prefer.
Tone for your AI Assistant:
Here, you will need to specify the tone you want your chatbot to use when interacting with users. You can choose a professional, friendly, formal, casual tone, etc., depending on the type of interaction you want to offer.
Company Name:
In this field, enter the name of the company or brand for which the assistant will provide service. This is a required field.
Company Website:
Enter the URL of your main website. It’s important that this link is correct, as it will be used in the chatbot’s configuration. This field is also required.
List of URLs to train your AI Assistant:
Here, you will need to enter the URLs of the pages on your website that contain relevant information to train the chatbot. It’s recommended to include sections like “About Us,” “Services,” or “Products.” You can enter up to 20 URLs and a total of 6 million characters.
Terms Acceptance:
Check this box to confirm that you agree to submit the data from this form for the training of your AI assistant and understand that you won’t be able to make changes to the configuration for the next month.
Start Chatbot Tuning Button:
Once all fields are completed and the terms are accepted, click “START CHATBOT TUNING” to begin the chatbot tuning process.
✨ The training process can take 24/48 hours, after which you will receive a confirmation email with your assistant’s ID, and you can move on to the next step.
Activation
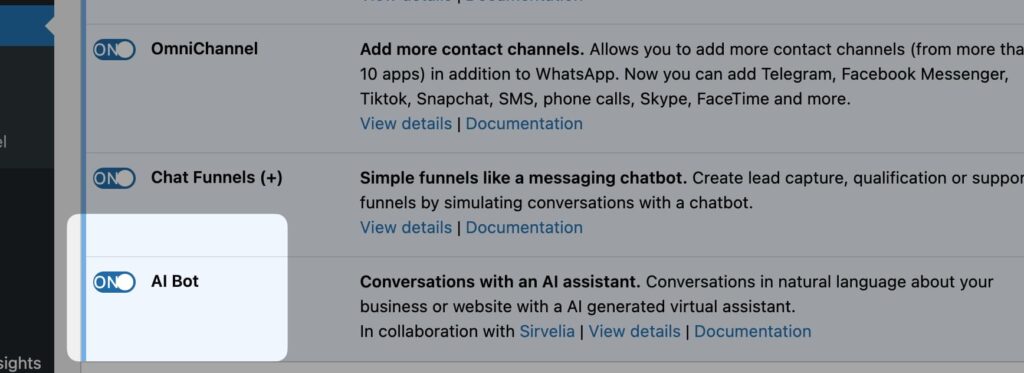
To add and configure your AI assistant, go to the WordPress dashboard in the Joinchat > Settings > Premium menu and enable the AI plugin by turning it ON.

Joinchat AI Settings
To configure your AI assistant’s functionality, go to the WordPress dashboard in the Joinchat > Settings > AI Bot tab
Message Counter:
Here you can see how many AI requests have been made during the month. The request limit is 5,000, and the counter resets on the first day of each month.

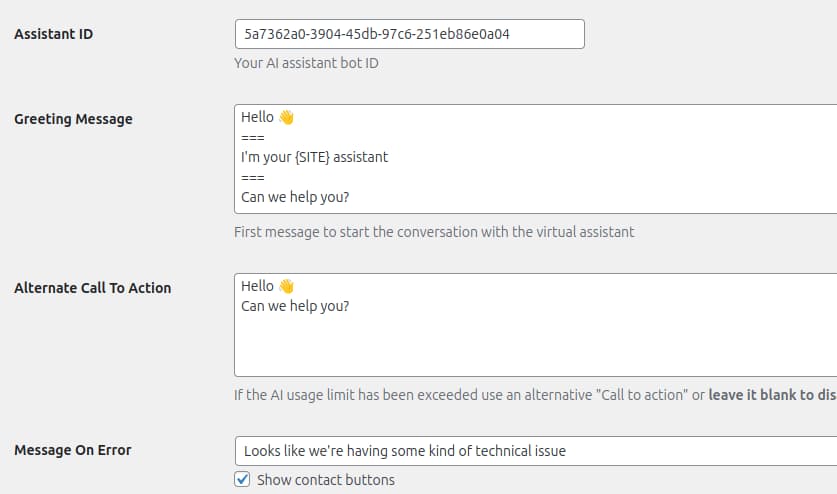
Assistant ID:
Here, you must enter your AI assistant’s unique identifier. You can find it in your email and in your Joinchat account by accessing your subscription details.
Welcome Message:
This is the first message the user will see when they start interacting with the assistant. This message should be friendly and direct, inviting users to interact. Keep in mind that this message is not generated by the assistant, so it doesn’t consume any resources. If you want to enrich the experience, check the CTA extras documentation.

Alternative Call to Action:
If the AI assistant reaches its monthly usage limit (5,000 messages), you can set up an alternative message so users can still receive support. This message will replace the assistant’s welcome message when the limit is exceeded. If left blank, the Joinchat button will be disabled.
Error Message:
Define a message that will appear if the system detects a technical error during the interaction with the assistant. You can also enable the “Show contact buttons” option so that the contact buttons configured in Joinchat are displayed.
Advanced Options
Optimize Response:
This option allows you to load only the Joinchat plugins during AI requests to reduce response time. This is especially useful for optimizing chat performance.

Disable Verification:
Enable this option if you want to disable nonce verification on AI messages. Nonces are security keys that help prevent CSRF (Cross-Site Request Forgery) attacks. If your site uses caching, it’s recommended to refresh it every 12 hours or less, or enable this option to avoid verification errors.
Publishing Your Assistant

Once your AI Assistant is optimized, it’s time to put it into action on your website.
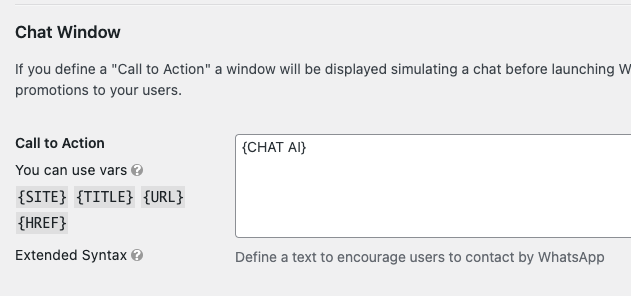
Use the shortcode {CHAT AI}, copy it and paste it into the call-to-action window of Joinchat. It can be in the general settings or on a specific page or product.
Keep in mind that you can combine it with the rest of Joinchat’s features, such as Chat Funnels, support agents, etc.
Translating the AI Assistant
Your AI assistant is ready to speak in dozens of languages, so the only thing you need to focus on is translating the message strings you’ve configured for the assistant, such as the “Welcome Message,” “Alternative CTA,” and the “Error Message.” To do this, follow the general plugin instructions.
