Support Agents Activation
To add and configure Agents, go to the WordPress dashboard in the Joinchat> Settings> Premium menu and activate the Support Agents add-on.
At a general level
To add and configure new agents, go to the WordPress control panel and click Joinchat> Settings> Agents Tab
- The first thing you’ll see is that the Phone field is no longer operational and you’ll be directed to the Agents tab.
- In the Message field, you can use the variable
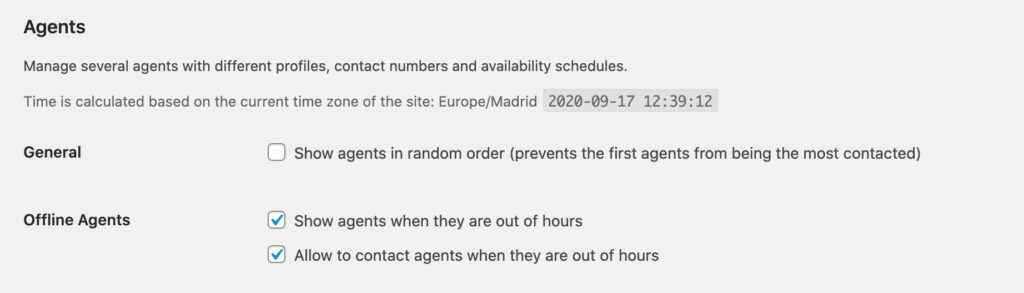
{AGENT}which will be replaced by the name of the agent chosen by the user. - In the Agents tab you will be able to see the time zone of the site that will be used to calculate the availability of the agents if they have a schedule. There are also some Agent options:
- Show agents in random order. If checked, on each page load the agents will be displayed in a different order. This avoids that the first agent is the most contacted. If unchecked the agents are displayed in the same order they have in the listing.
💡 You can reorder the agents by dragging and dropping them in the listing. - Show agents when they are out of schedule. If checked, the agents will continue to appear, even if they are out of schedule, showing that the agent is offline and the time remaining until it is operational again.
⚠️ NOTICE: If unchecked and no agent is available, the Joinchat button will not be displayed. - Allow to contact agents when they are out of hours. Check to allow to start chatting with the agent even if they are offline.
- Show agents in random order. If checked, on each page load the agents will be displayed in a different order. This avoids that the first agent is the most contacted. If unchecked the agents are displayed in the same order they have in the listing.
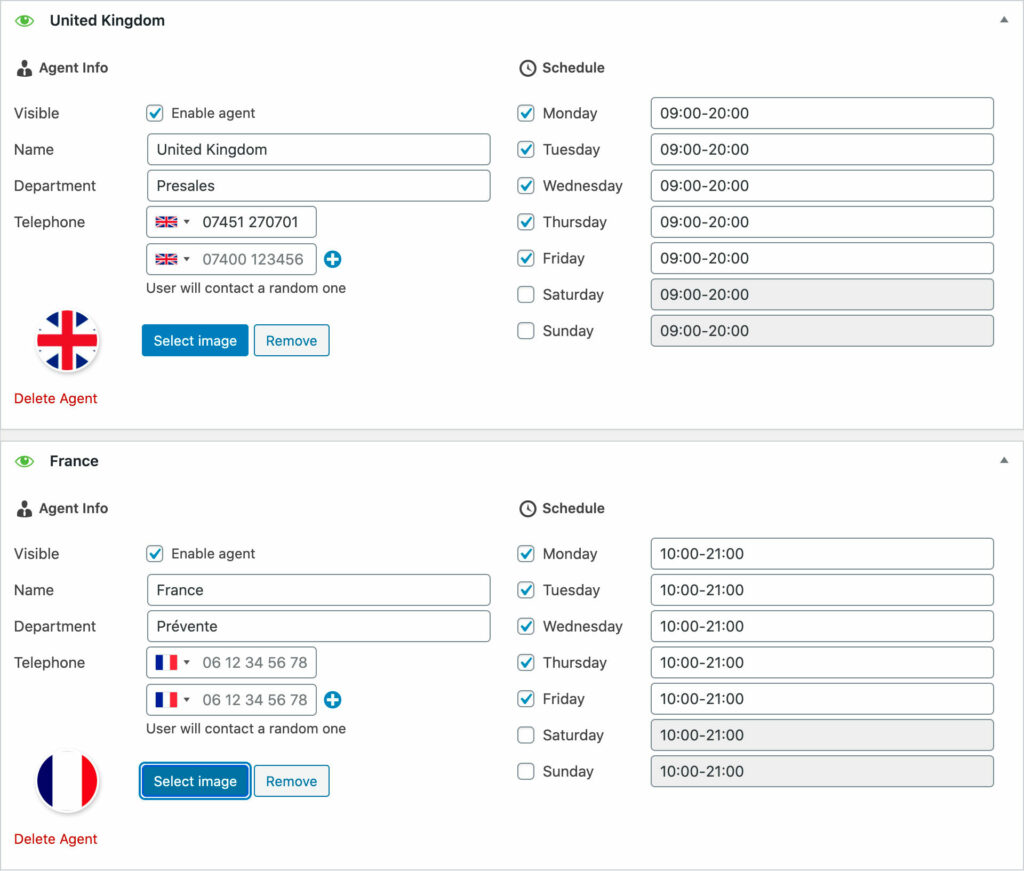
- Agent Card. It is divided in two parts:
- 👤 Agent data, where you can fill in the name, department, phone and photo. With the “Visible” field you can easily activate or deactivate an agent without deleting him/her (for example, on vacation days).
- ⏱Schedule, to mark the days of the week when the agent will be operational, and the time slots. For example:
09:00-14:00 16:00-19:00.
The time slot is active if: start time ≤ current time < end time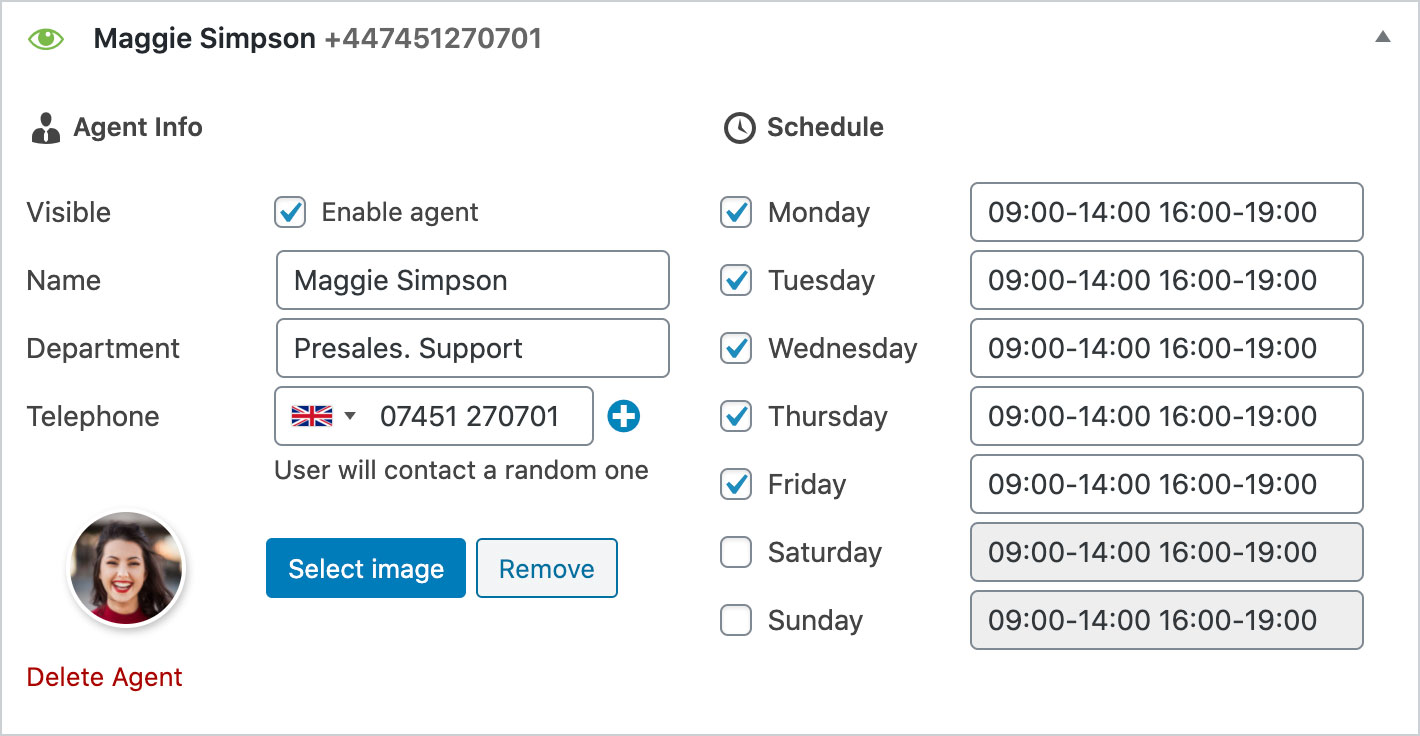
- To remove an Agent, go to the bottom left of the card and click on “Remove Agent”.
- To create a new Agent use the button in the lower right corner “Add Agent”. You can add and configure as many agents as you want.
- Click the Save Changes button to set the new values indicated.
At Page Level
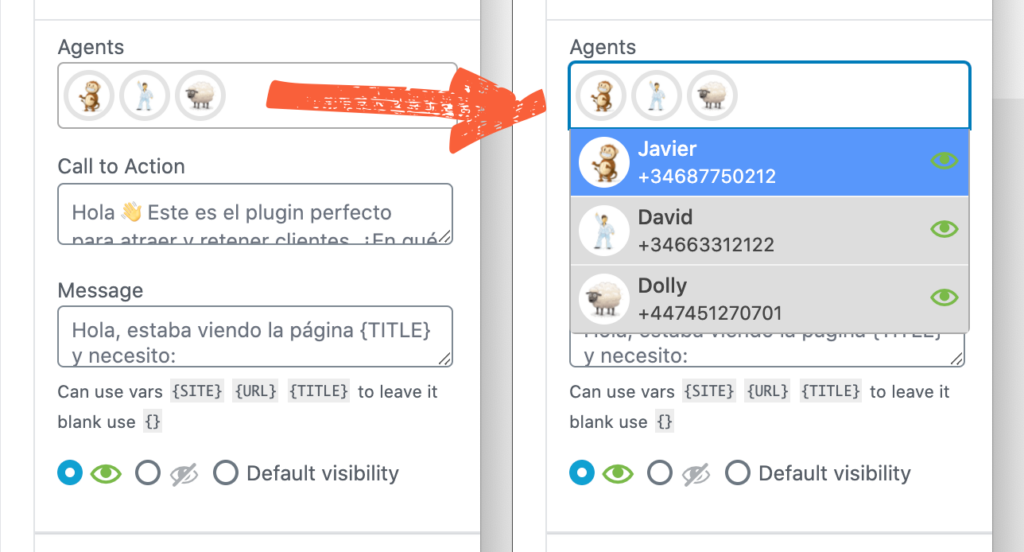
Agents can only be created and configured at a general level from the Joinchat settings but from each page or entry you can activate or deactivate the agents that will be visible on it.
- To set up Joinchat on a specific page or entry, go to that page and edit it.
- On the right side you will find the Joinchat Metabox where you can customize the Agents, Call to Action, Message, and Joinchat display options for this particular page.
- Finally, to save the changes, update the page or post and click on Update.
📝 Example: You have an event website with your usual agents but next month you have a very special event and you want to dedicate an agent exclusively to attend clients interested in that event.
1 – In Joinchat settings you will create the special event agent but make it not “Visible” so that it does not appear on the other pages of your site..
2 – On the special event page you will configure that only the agent of that event will be visible so that all interested parties will consult him.
With Random Phone addon
Support Agents is also compatible with the Random Phone addon’s randomization system.
💡 It can be useful, for example, to create departments, branches or franchises, where each one has several telephone numbers.
- Add phones: In the agent’s card, next to the phone number, there will be a “+” button with which you can add more numbers to the agent. The user will contact one of the numbers at random each time.
- Finally click on Save changes to update.